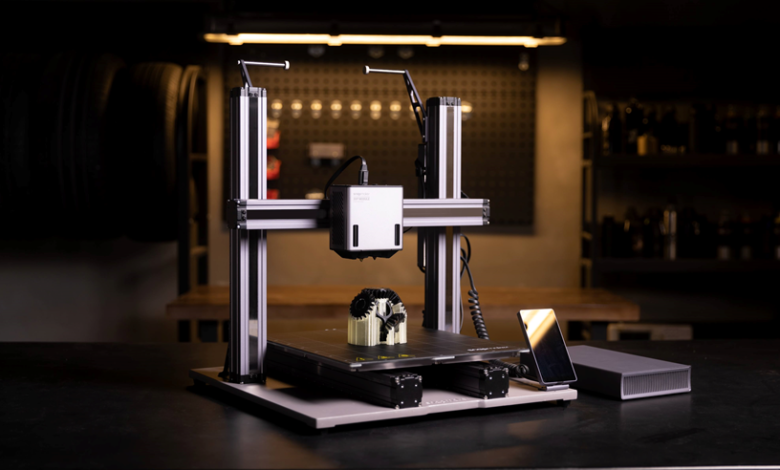
Consumer 3D printers offer hobbyists and small-scale prototypers the ability to create custom home organization solutions, such as modular storage bins, cable organizers, or drawer dividers, that combine functionality with aesthetic appeal. By using dual-color 3D printer filament techniques—such as filament swapping or multi-material printing on single-extruder printers—you can produce visually striking, practical items tailored to specific needs. This guide provides a step-by-step approach to designing, printing, and optimizing dual-color home organization solutions, ensuring durable and attractive results for everyday use.
Why Dual-Color Filament Techniques for Home Organization?
Dual-color printing enhances the visual appeal of home organization items by allowing contrasting colors or patterns, making them easier to identify or integrate into home decor. For example, a storage bin with a colored label or a cable organizer with a highlighted clip can improve usability and style. These techniques are accessible on consumer 3D printer, requiring only a single extruder and careful planning, making them ideal for hobbyists looking to create personalized, professional-looking solutions without advanced equipment.
Step 1: Designing for Dual-Color Functionality
Effective design is critical for combining functionality with dual-color aesthetics. Use CAD software like Tinkercad, FreeCAD, or Fusion 360 to create organization solutions tailored to your needs:
- Identify the Project: Choose a practical item, such as a modular storage bin for tools, a cable organizer for desks, or a drawer divider for kitchen utensils. Ensure the design has distinct sections for color changes, like a base in one color and a label or rim in another.
- Split for Color Changes: Design the model with clear layer boundaries where colors will switch. For example, a storage bin might have a base up to 10 mm height in one color and a top rim or label in another. Use CAD tools to split the model into segments at specific heights.
- Optimize for Strength: Add features like 1–2 mm thick walls and reinforcing ribs for durability, especially for load-bearing items like bins. Include snap-fit or interlocking mechanisms for modular designs to allow easy assembly.
- Incorporate Visual Elements: Design embossed or debossed text (e.g., labels like “Tools” or “Cables”) or patterns that will stand out in a contrasting color. Keep text or details at least 0.5 mm thick to ensure printability.
- Account for Tolerances: Add 0.2–0.4 mm clearances for interlocking parts to ensure a snug fit after printing.
Test your design with a small prototype, such as a single divider or a scaled-down bin, to verify dimensions and color transition points before printing the full model.

Step 2: Selecting Filaments for Dual-Color Printing
Choose filaments that are compatible for dual-color printing, typically the same material type to ensure consistent adhesion and printing conditions:
- PLA: Ideal for most home organization projects due to its ease of printing, wide color range, and low cost. Prints at 190–220°C with a heated bed at 50–60°C.
- PETG: Offers greater durability and flexibility for items like cable clips or stackable bins. Prints at 230–250°C with a heated bed at 60–80°C.
- Color Choices: Select contrasting colors (e.g., black and white, blue and yellow) for visual impact. Ensure both filaments have the same diameter (1.75 mm or 2.85 mm) and similar printing temperatures.
Store filaments in sealed containers with desiccants to prevent moisture absorption, which can cause stringing or poor layer adhesion during color swaps. Dry filaments in a dehydrator at 45–50°C for 4–6 hours if they’ve been exposed to humidity.
See also: Green Tech Solutions: Powering a Sustainable Future
Step 3: Configuring Slicer Settings for Filament Swaps
Since most consumer 3D printers have a single extruder, filament swapping is the primary method for dual-color printing. Configure your slicer software (e.g., Cura, PrusaSlicer) to pause at specific layers for color changes:
- Load the Model: Import your design into the slicer and set basic parameters, such as 0.2 mm layer height and 40–50 mm/s print speed for PLA.
- Identify Color Change Layers: Use the slicer’s layer preview to pinpoint the layer where the color should change (e.g., layer 50 at 10 mm height for a 0.2 mm layer height). Note the exact layer numbers for each transition.
- Add Pause Commands: In Cura, use “Extensions > Post Processing > Modify G-Code” to add a “Filament Change” script. In PrusaSlicer, use “Custom G-code” at the desired layer. Set the printhead to park away from the model during pauses to prevent oozing.
- Optimize Retraction: Set retraction to 1–2 mm (direct-drive) or 2–4 mm (Bowden) at 30–40 mm/s to minimize stringing during color swaps. Enable “wipe” or “coasting” to clean the nozzle before pausing.
- Adjust Adhesion Settings: Use a brim (5–10 mm) or raft for larger parts like bins to ensure bed adhesion. Set the bed temperature to 50–60°C for PLA or 60–80°C for PETG.
Generate the G-code and test with a small model, like a 20 mm x 20 mm divider with a color change at 5 mm, to confirm pause accuracy.
Step 4: Performing Filament Swaps
When the printer pauses for a color change:
- Prepare the New Filament: Cut the new filament at a 45-degree angle for smooth insertion. Ensure it’s the same material type as the first filament.
- Unload the Current Filament: Use the printer’s interface to unload the filament or manually extrude and remove it. Handle the hot nozzle (190–250°C) carefully.
- Load the New Filament: Feed the new filament until it extrudes consistently. Purge 5–10 mm to clear residual material from the previous color.
- Resume Printing: Resume the print and monitor the first few layers to ensure proper adhesion and color transition.
For multiple color changes, repeat at each pause. Practice on a test print to streamline the process.
Step 5: Post-Processing for Durability and Aesthetics
Enhance the functionality and appearance of your organization solutions:
- Sanding: Smooth layer lines with 800–1200 grit sandpaper, especially at color transitions, to create a polished look. Wet-sand for finer finishes.
- Painting or Sealing: Apply a clear coat to protect surfaces and enhance color vibrancy. Use plastic-safe sealants to avoid damaging PLA or PETG.
- Assembly Testing: For modular designs, test-fit parts to ensure interlocking mechanisms work smoothly. Adjust tolerances or reprint if needed.
Practical Tips for Success
- Start with Simple Designs: Begin with a single divider or small bin to master filament swapping before tackling complex modular systems.
- Use Contrasting Colors: Choose bold color combinations to make labels or patterns pop, improving usability.
- Dry Filaments: Ensure filaments are moisture-free to prevent defects during swaps.
- Log Settings: Save successful slicer profiles for each filament type to simplify future prints.
- Test Durability: For load-bearing items like bins, test with weights to confirm structural integrity.
Benefits for Home Organization
Dual-color 3D printed organization solutions combine functionality with aesthetics, making it easier to sort and access items like tools, cables, or utensils. The ability to customize sizes and shapes ensures a perfect fit for any space, while dual-color designs add visual clarity (e.g., labeled bins for quick identification). These projects are cost-effective, with 1 kg of filament ($20–$30) yielding multiple organizers, saving money compared to store-bought solutions.
Challenges and Solutions
Filament swaps can be time-consuming for designs with frequent color changes. Group color changes into fewer pauses by designing larger single-color sections. Poor layer adhesion at color transitions can occur; increase nozzle temperature by 5°C or reduce cooling (20–40% fan speed) for the first layers after a swap. If stringing occurs, adjust retraction settings and purge more filament during swaps.
Conclusion
Crafting custom 3D printed home organization solutions with dual-color filament techniques allows hobbyists to create functional, visually appealing items tailored to their needs. By designing smartly, optimizing slicer settings, and mastering filament swaps, you can produce professional-grade organizers with consumer 3D printers. Start with small test prints, refine your process, and apply post-processing for durability and style. This approach transforms your 3D printer into a powerful tool for personalized, practical home organization.